In this tutorial we will learn how to use layer masks in Photoshop in order to blend images together. This is a fun technique that is useful in photography, print design and web design.
 Arrange the images so they overlap where you’d like the blend to take place (displayed below).

 You will see a Layer Mask appear next to your image icon in the Layers
panel. Make sure the Layer Mask is selected and not the image icon
(displayed below in red). The layer mask is what actually allows us to
blend images by adding a transparent fade to the top image.
You will see a Layer Mask appear next to your image icon in the Layers
panel. Make sure the Layer Mask is selected and not the image icon
(displayed below in red). The layer mask is what actually allows us to
blend images by adding a transparent fade to the top image.


Now that everything’s all set, lets blend images. using the Gradient Tool, click and drag the gradient in the direction you’d like to apply the blend. Note that the transparent side of the gradient will be the fade while the black side of the gradient will be the solid image.
The longer the gradient, the more gradual the blend. So for more gradual blends, apply the Gradient Tool over a larger section (as displayed in F1 below), and for more abrupt blends, apply the Gradient Tool over a smaller section (as displayed in F2 below).
It may take a little adjusting so if you don’t like your initial blend, undo (Ctrl + z) and try it again.

Initial Setup
First select two images you’d like to blend and open them in the same Photoshop document. Below are the two images I will be working with.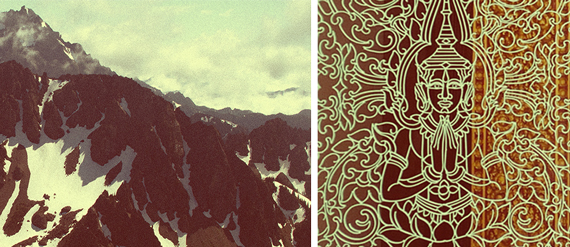

Layer Masks
In the Layers panel, select the top image, and select the “Add Layer Mask” button (displayed below in red).

Gradient Tool
Now select the “Gradient Tool” from your toolbar (displayed below in red). In the Gradient Tool options make sure the black to transparent gradient is selected (displayed below in green).Now that everything’s all set, lets blend images. using the Gradient Tool, click and drag the gradient in the direction you’d like to apply the blend. Note that the transparent side of the gradient will be the fade while the black side of the gradient will be the solid image.
The longer the gradient, the more gradual the blend. So for more gradual blends, apply the Gradient Tool over a larger section (as displayed in F1 below), and for more abrupt blends, apply the Gradient Tool over a smaller section (as displayed in F2 below).
It may take a little adjusting so if you don’t like your initial blend, undo (Ctrl + z) and try it again.

No comments:
Post a Comment